Object Prop
The Object Prop passes loop/object/array/json data from outside a component, into the component.
Why the Object Prop Exists
There are two main reasons for the Object Prop:
- It's important to build components in an atomized way. Using keys in a component that rely on specific configurations outside the component is bad component architecture. It harms the component's ability to be used, exported, shared, or migrated.
- Sometimes it is preferable to pass an entire object or array at once, instead of creating props for everything separately.
The main thing you need to know is that loop/object/array/json data that exists outside of a component is not accessible to the component unless it's explicitly passed into the component via the Object Prop.
For example, if you create a blog post card component and put it inside {#loop posts as post}, you will notice that dynamic data keys like {post.title} and {item.permalink.relative} don't render. This is by design.
To make dynamic data keys render in this scenario, you can create an Object Prop and map the keys to the object, like this: {props.object.title} and {props.object.permalink.relative}.
When using the component, you tell the component instance which object to pass data from (the blog post loop in this example) and your keys will start working.
Always think of a component as completely separated from the page you are currently editing. It has its own "scope." Therefore, the only data it has access to by default is global data (this, site or url). If the component needs to access local data, that data needs to be explicitly passed into the component. This is done with the Object Prop.
When to Use an Object Prop vs. Individual Props
Not every component needs an Object Prop — it's worth deciding up front which approach fits the component's job:
- Use an Object Prop when the component's job is to render an item from a loop or query — a post card, a product card, a team member card, and so on. Components like this always render the same standardized set of fields (title, permalink, featured image) no matter which post type or data source they're pointed at. Since there's no per-instance customization happening — it's just data passthrough — wiring up an individual prop for every field would be wasted effort.
- Use individual props when the component's job is a reusable UI piece that you configure — a CTA, an alert box, a badge. Each instance of these needs to be authored independently, so individual Text/Image/Select props make more sense than one big object.
A quick gut check: if the fields are standardized (any item of that type will always have the same shape), reach for an Object Prop. If the fields need per-instance customization, use individual props instead.
Adding Object Prop
When your component needs to be nested in a loop in order to function properly, it's a good indication that you need an Object Prop.
In the component editor, select "Object" from the props list.
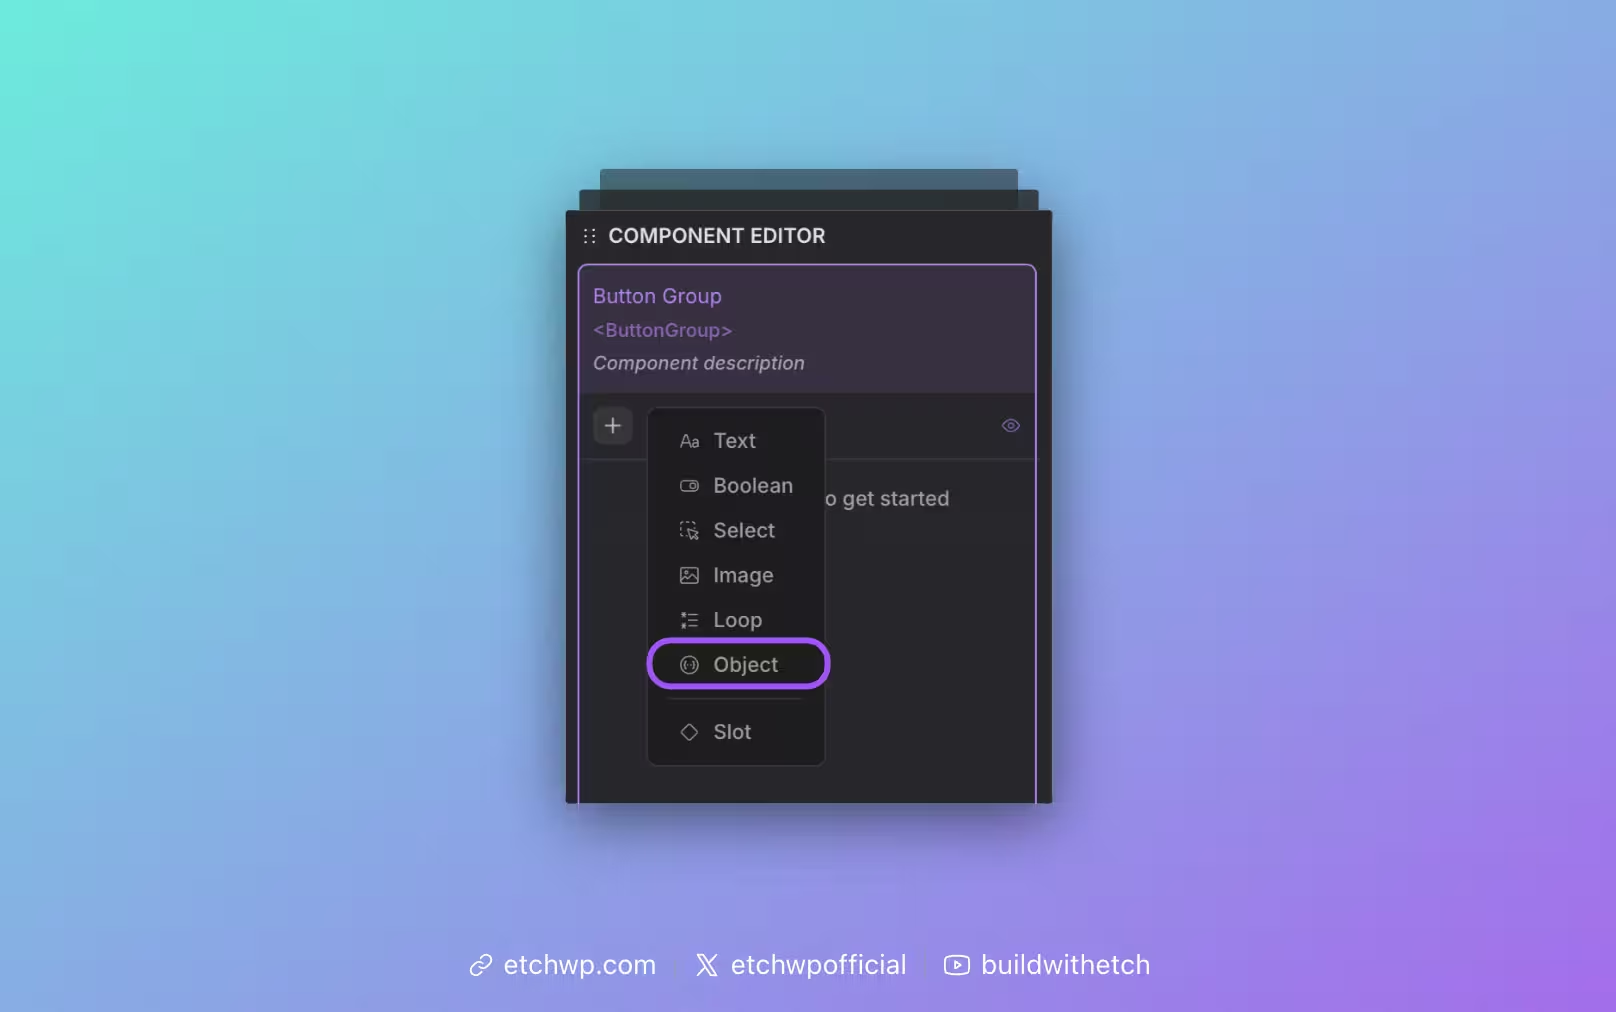
There are two things you need to know about the Object Prop:
- The key for your Object Prop will be the base key for all your dynamic data (e.g.
{props.yourObject.foo}). - The object input is for fallback/preview content only.
Using the Object Prop in the Component Editor
Once you've created an Object Prop and named it, you can start to reference the data it's going to pull. This is done the same way you reference all other dynamic data. The only difference is that you use the props extension combined with the object key.
Using a simple blog post card as an example:
We create an Object Prop named "post". Our card is going to have a featured image, heading, and link.
- Heading ===
{props.post.title} - Featured Image ===
{props.post.featuredImage} - Link ===
{props.post.permalink.relative}
Previewing Data
Since the dynamic data now relies on an external object that you're not currently referencing, the dynamic data keys will fail to resolve to anything while you're building the component. They'll also fail to resolve when the component is used, until the object prop is told to reference something.
This isn't great for DX or UX because empty/broken components that are waiting on data aren't very user friendly.
That's what the Object Prop code editor is for. It accepts placeholder/default object data and will render that data when an object source is not available.
For our blog post card situation, we'd add the following JSON to our Object Prop in the component editor:
{
    "title": "Title of the Post",
    "featuredImage": "[url-to-sample-image]",
    "permalink": {
        "relative": "#"
    }
}
This is the data you'll see while you're building the component. And when you use the component in your development workflow, it's the data you'll see prior to choosing a source object.
Instead of hand-typing this fallback JSON from memory, output {item} directly in your loop on the page and see what actually comes back. Copy the JSON for one entry (trimming any values you don't need), and paste it into the Object Prop's code editor. You'll be working with real data, so you'll immediately know whether your dynamic data syntax inside the component is correct instead of guessing at the field names/shape.
Using Your Component
Once your component is built using the Object Prop, it's very easy to use. Simply drop your component into the page and look for the object attribute in the attributes panel. It will be named whatever you named your Object Prop.
This input is a combobox. If you place the component inside a loop, it will automatically populate itself with the proper key from any parent or ancestor loops. If it's a single loop, your component will work out of the box. If it's a nested loop, you'll want to make sure that the correct data source is selected.
You can also type custom values into the input for edge case scenarios.
Real-World Examples
The examples below walk through complete, end-to-end setups:
Example 1: A blog post card inside a loop
This is the most common use case for the Object Prop — a card component that needs to render a different post on every iteration of a loop.
1. Create the Object Prop. In the component editor, add an Object Prop and give it the key post. This key is the base for every dynamic data reference inside the component ({props.post.title}, etc.).
2. Build the component markup using that Object Prop:
<article class="post-card">
    <etch:img mediaId="{props.post.featuredImage.id}" alt="{props.post.title}" class="post-card__image" />
    <div class="post-card__content">
        <h3 class="post-card__title">{props.post.title}</h3>
        <a href="{props.post.permalink.relative}" class="post-card__link">Read more</a>
    </div>
</article>
3. Add fallback data in the Object Prop's code editor so the component isn't empty while you're building it:
{
    "title": "Title of the Post",
    "featuredImage": {
        "id": 0
    },
    "permalink": {
        "relative": "#"
    }
}
4. Use the component on a page, dropped inside a loop over posts:
{#loop posts as post}
    <PostCard post="{post}" />
{/loop}
Because the component is inside {#loop posts as post}, the object attribute's combobox automatically detects post as an available source. Every card in the loop now renders that iteration's title, featured image, and link — without the component ever needing to know about the page's loop directly.
Example 2: Nested loops (team members grouped by department)
Object Props get more interesting once there's more than one loop on the page. Say you're looping over departments, and each department has a nested loop of team members. You want a TeamMemberCard component for each person.
1. Create the Object Prop. In the TeamMemberCard component editor, add an Object Prop and give it the key member — matching the shape of a single person ({props.member.name}, {props.member.photo}, etc.), not a whole department.
2. Use the component inside the nested loop:
{#loop departments as department}
    <section class="department">
        <h2>{department.name}</h2>
        {#loop department.members as member}
            <TeamMemberCard member="{member}" />
        {/loop}
    </section>
{/loop}
Here, member is the correct source because it's the nearest loop to the component. If you had instead selected department in the combobox, the component would receive the whole department object (name + members array) instead of a single person — so always double check the combobox is pointed at the innermost/nearest loop that actually matches the shape your component expects.
Example 3: Static usage with a hand-typed object
The Object Prop doesn't require a loop at all. For a one-off use — say, a single "Featured Case Study" card placed once on a landing page — you can type a custom value straight into the combobox instead of pointing it at a loop item.
1. Reuse an existing Object Prop. This example reuses the post Object Prop from the PostCard component in Example 1 — no new prop needs to be created, since the shape of a "case study" and a "post" are the same (title, featuredImage, permalink).
2. Type a custom object into the combobox on the component instance, instead of selecting a loop source:
{
    "title": "How Acme Co. Cut Support Tickets by 40%",
    "featuredImage": {
        "id": 482
    },
    "permalink": {
        "relative": "/case-studies/acme-co"
    }
}
Paste this JSON into the object combobox on the component instance (instead of selecting a loop source), and the same PostCard/TeamMemberCard-style component renders it exactly as if it came from a loop — no changes to the component itself are needed.
Troubleshooting
A Nested Loop Stops Working Inside a Component
A common mistake is extracting markup that contains a nested loop into a component, and expecting the nested loop to keep working unchanged. This works fine directly on the page:
{#loop products as item}
    <h3>{item.title}</h3>
    {#loop item.terms as term}
        <p>{term.name}</p>
    {/loop}
{/loop}
But the moment the <h3> and the nested loop are extracted into a ProductCard component, {term.name} stops rendering. This is the scope rule from the tip above: the component can't see item (or anything derived from it) unless it's explicitly passed in — and a loop can't be split across the component boundary, with the loop itself outside and its output rendering inside.
The fix is to pass the whole loop item into the component via an Object Prop, and move the nested loop inside the component so it can loop over the prop directly:
- Add an Object Prop to
ProductCard, keyedproduct. - Move the nested loop inside the component, referencing the prop as the loop source:
<h3>{props.product.title}</h3>
{#loop props.product.terms as term}
    <p>{term.name}</p>
{/loop}
- On the page, keep the outer loop, and pass the whole item into the component's
objectattribute:
{#loop products as item}
    <ProductCard object="{item}" />
{/loop}
The rule to remember: a loop and everything it renders must live on the same side of the component boundary. Either keep the whole loop (and its markup) outside the component, or move the whole loop inside the component and feed it the source array through an Object Prop — never split a loop's opening tag from its body across that boundary.
A Slot Doesn't Receive Per-Item Loop Data
It's tempting to treat a slot like a per-item placeholder inside a component's loop, the way an Object Prop bridges scope. It can't. A slot's fill content is authored once, in whatever scope the component instance is placed in, and dropped into the {@slot} position as-is. It never re-runs per loop iteration with a different item in context.
For example, this component loops over props.postLoop and leaves a slot for each card:
<ul>
    {#loop props.postLoop as post}
        <li>{@slot Card}</li>
    {/loop}
</ul>
Filling the slot like this, from outside the component, will not work:
<PostList postLoop="{posts}">
    {#slot Card}
        <PostCard object="{post}" />
    {/slot}
</PostList>
post doesn't exist at the point this markup is written — it's outside the loop, in PostList's usage, not inside it. Every card ends up empty because the slot content is resolved once, before the loop ever runs.
The fix is to skip the slot for this use case and put the component directly inside the loop instead, passing the item via an Object Prop exactly as described above:
<ul>
    {#loop props.postLoop as post}
        <li>
            <PostCard object="{post}" />
        </li>
    {/loop}
</ul>
If different instances of PostList need different card layouts (the reason you might have reached for a slot in the first place), nest a few candidate components inside the loop and use a Select or Boolean prop on PostList to choose which one renders, rather than trying to make that choice via a slot.
This limitation only exists because Components have their own scope. If PostList doesn't need to update everywhere it's used, saving it as an (unsynced) Pattern instead of a Component sidesteps the whole issue — a Pattern is just saved markup, so once it's placed on a page it behaves like you typed the loop there directly, and post stays in scope for anything nested inside it, slot or no slot. The tradeoff is losing the "edit once, updates everywhere" behavior a Component provides.